This articlw will describe network configuration like IP address and DNS server on Ubuntu.
Table of Contents
- 1. Network configuration on Ubuntu
- 2. Static network configuration
-
3. Network configuration for DHCP
- 3.1. Network configuration for DHCP with "Settings"
- 3.2. Network configuration for DHCP with /etc/network/interfaces (Not recommended)
- 3.3. Network configuration for DHCP with nmtui
- 3.4. Network configuration for DHCP with nmcli
- 3.5. Network configuration for DHCP with systemd-networkd
- 3.6. Use specific DNS server instead of DNS servers provided by DHCP server
1 Network configuration on Ubuntu
NetworkManager sets network configuration for DHCP when installing Ubuntu.
Ubuntu provides /etc/network/interfaces which can run without NetworkManager. And Ubuntu provides NetworkManager and systemd-resolved.
Ubuntu provides systemd-networkd which will be alternative of NetworkManager too. But systemd-networkd.service is disabled by default.
So NetworkManager will be used for a while and you can use nmcli nmtui for a while.
You need to know about systemd-resolved which is provided when Ubuntu 16.10.
1.1 nameserver 127.0.0.53
systemd-resolved appends nameserver 127.0.0.53 to /etc/resolv.conf, listen 127.0.0.53 and send query to DNS server.
$ cat /etc/resolv.conf
<snip>
nameserver 127.0.0.53
search hiroom2.com
You can check DNS server used by systemd-resolved with "systemd-resolve –status".
$ systemd-resolve --status
<snip>
Link 2 (ens3)
      Current Scopes: DNS
       LLMNR setting: yes
MulticastDNS setting: no
      DNSSEC setting: no
    DNSSEC supported: no
         DNS Servers: 192.168.11.2
          DNS Domain: hiroom2.com
systemd-resolved will send query to DNS servers like round robin.
This is discussed now.
If you use primary DNS server and secondary DNS server for redundancy, there is no problem. This is better for load distribution.
If you use primary DNS server and secondary DNS server for different name resolution, you need to change primary DNS server to send query reqursive to secondary DNS server. And you need to make only primary DNS server to be written to /etc/resolv.conf. If you manage DHCP server and primary DNS server, you can change on server side.
2 Static network configuration
This article will introduce about static network configuration like static IP address.
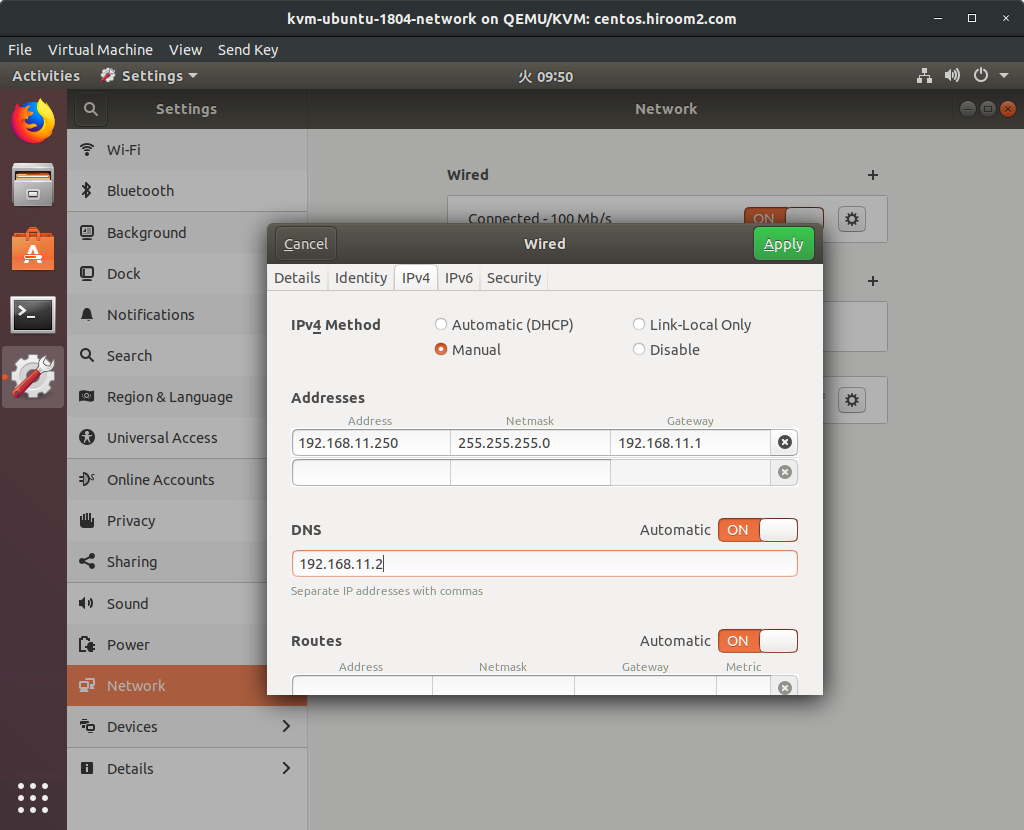
2.1 Static network configuration with "Settings"
Open "Settings" and edit "Wired" of "Network".
Change "IPv4 Method" to "Manual".
Set "Address" to host machine's IP address, "Netmask" to your subnet like 255.255.255.0, "Gateway" to gameway's IP address and "DNS" to DNS server's IP address.
Click "Apply" and restart machine.
2.2 Static network configuration with /etc/network/interfaces
NetworkManager and systemd-resolved does not look dns-server and dns-nameservers. You need to write these to /etc/system/resolve.conf.
#!/bin/sh

INTERFACE=ens3
cat <<EOF | sudo tee /etc/network/interfaces
auto lo
iface lo inet loopback
auto ${INTERFACE}
iface ${INTERFACE} inet static
      address 192.168.11.250
      netmask 255.255.255.0
      network 192.168.11.0
      broadcast 192.168.11.255
      gateway 192.168.11.1
      dns-server hiroom2.com
      dns-nameservers 192.168.11.2
EOF

# systemd-resolved does not get dns-nameservers and dns-search in
# /etc/network/interfaces.
sudo sed -i /etc/systemd/resolved.conf \
     -e 's/^#DNS=/DNS=192.168.11.2/g' \
     -e 's/^#Domains=/Domains=hiroom2.com/g'

sudo reboot
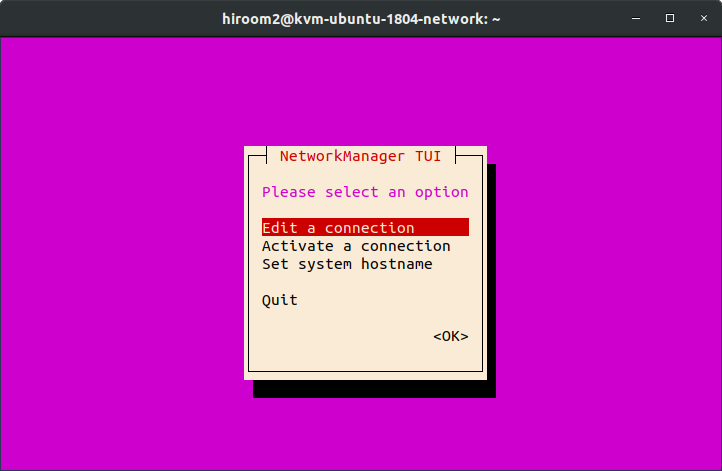
2.3 Static network configuration with nmtui
Run nmcli command with sudo.
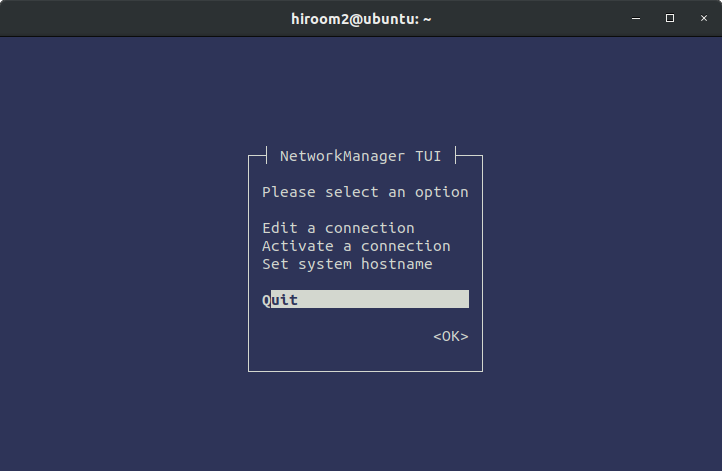
$ sudo nmtui
You can move cursor with Ctrl + p, Ctrl + n and TAB, but arrow key may be easier than these. You can select item on cursor with ENTER key.
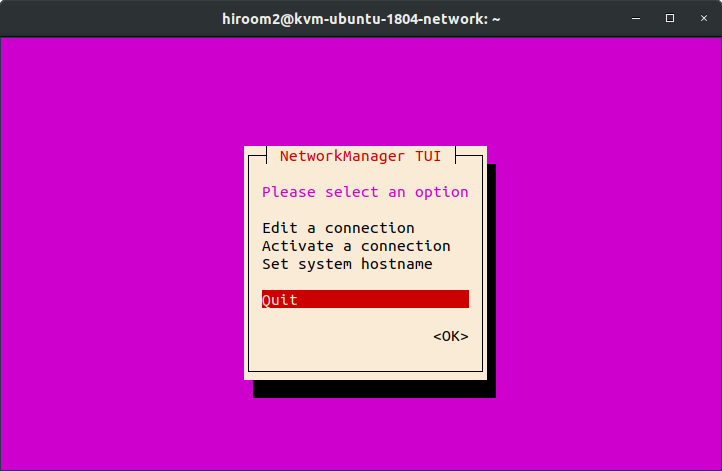
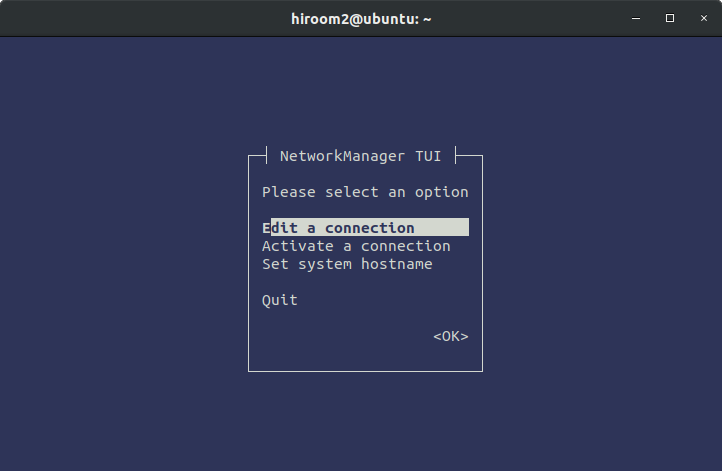
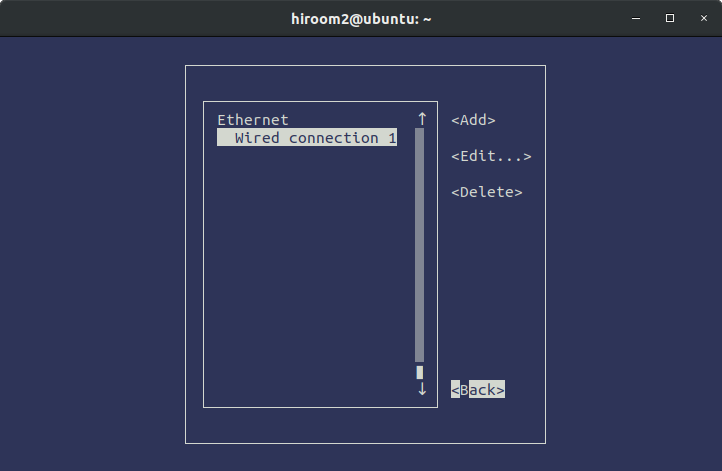
Select "Edit a connection".
Select "Wired connection 1" of "Ethernet".
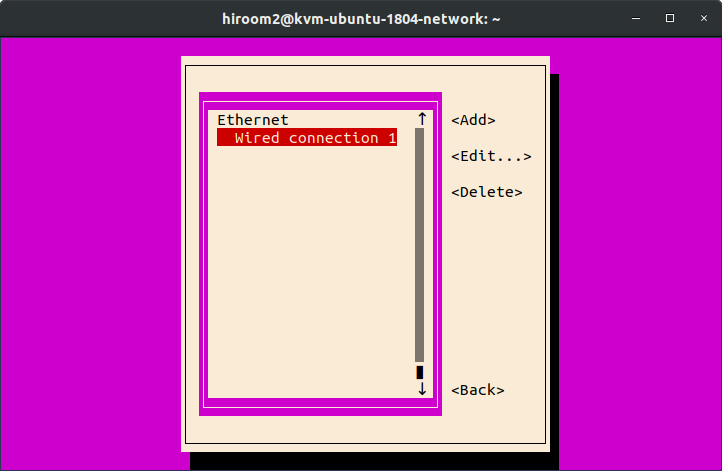
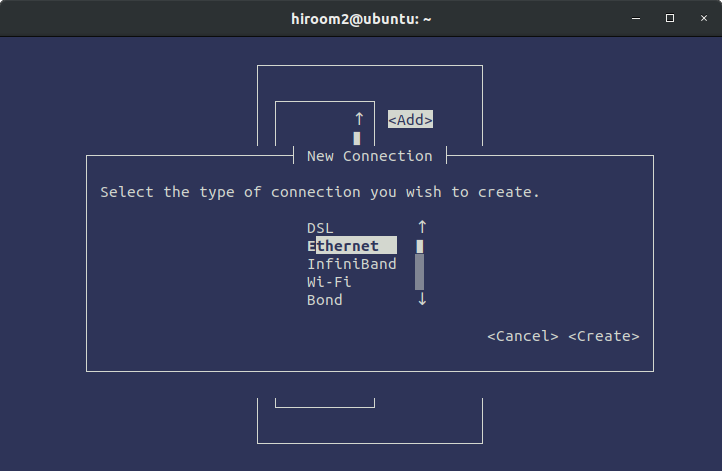
If there is no connection, you can add connection with select "Add" and "Ethernet". Input "Profile name" and set "Device" to your network interface name like ens3.
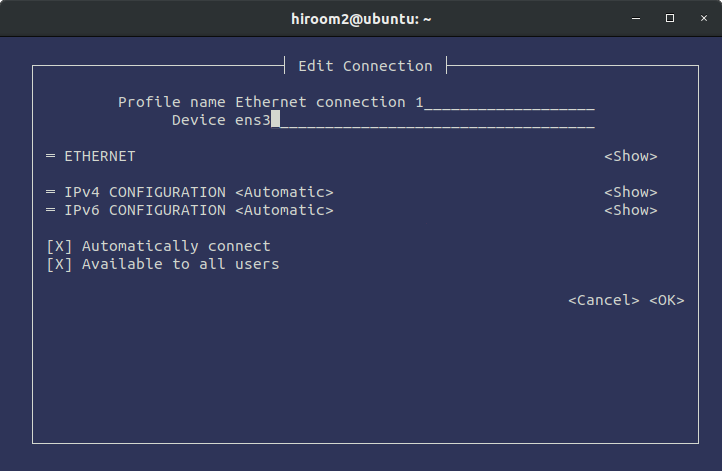
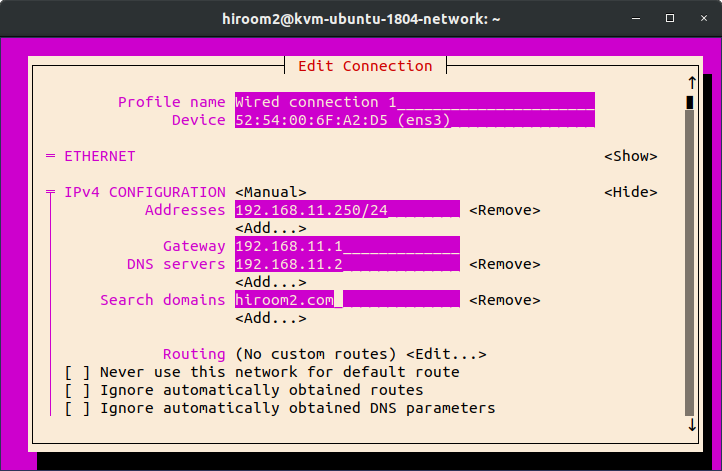
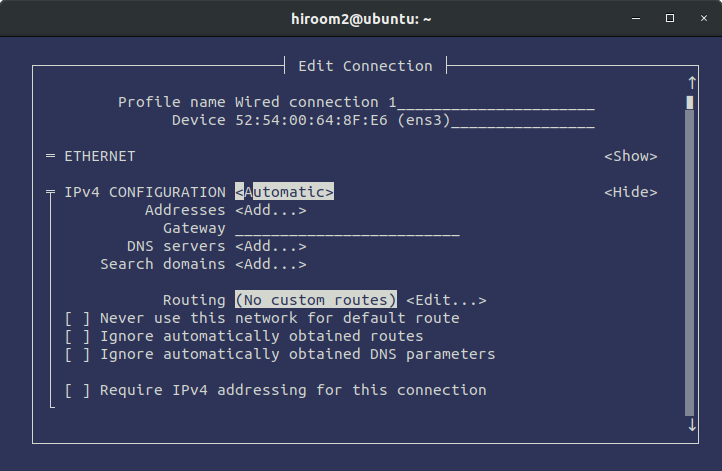
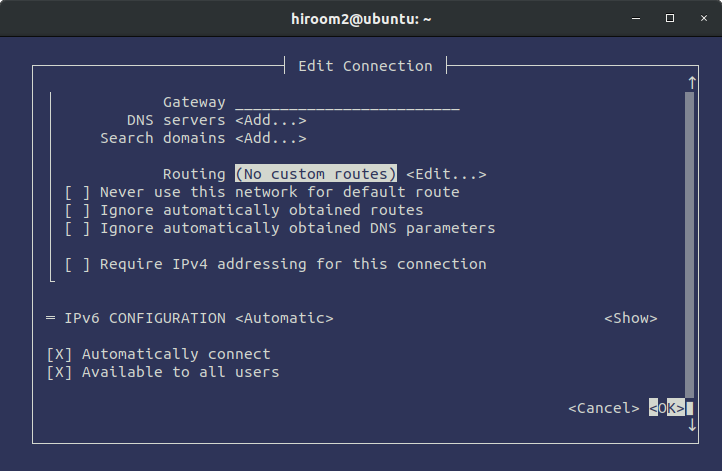
Select right side of "IPv4 CONFIGURATION" and change it to "<Manual>". Select "<Show>" at the right side of "<Manual>".

Set "Addresses" to host machine's IP address with subnet, "Gateway" to gateway's IP address, "DNS servers" to DNS server's IP address and "serch domains" to search domain in /etc/resolv.conf.
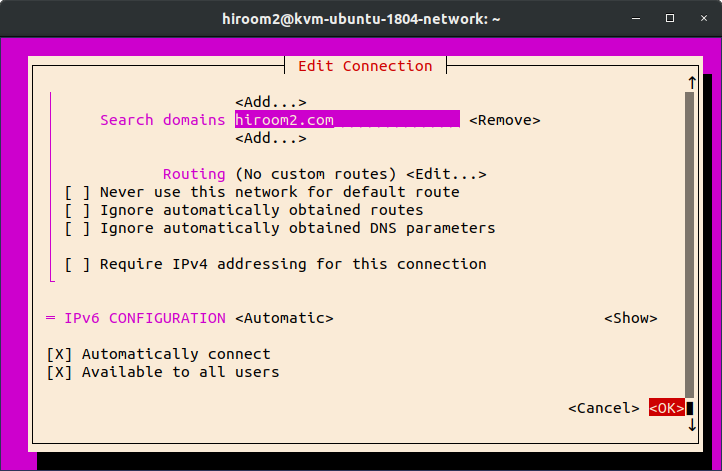
Select "<OK>" at the right bottom.
Select "<Back>" at the right bottom.
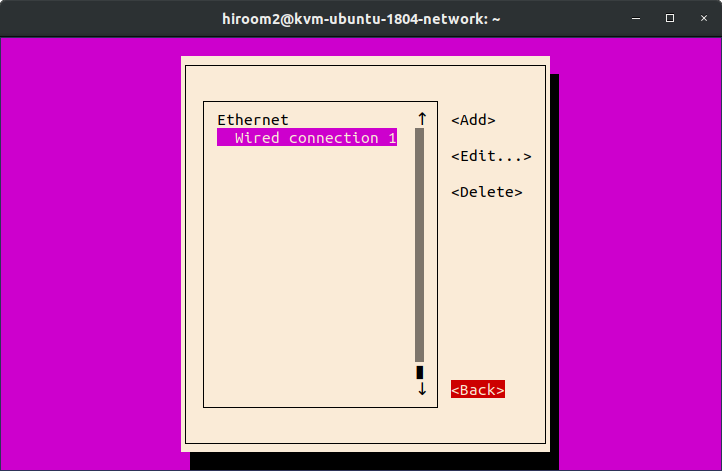
Select "<Quit>" at the bottom.
2.4 Static network configuration with nmcli
The nmcli is more useful for script than nmtui.
After installing Ubuntu, "Wired connection 1" is created.
$ nmcli -t -f NAME con
Wired connection 1
If there is no connection, you need to create a connection with "nmcli connection add".
#!/bin/sh

INTERFACE=ens3
CONNECTION_NAME=$(nmcli -t -f NAME connection)
if [ -z "${CONNECTION_NAME}" ]; then
  CONNECTION_NAME='Wired connection 1'
  sudo nmcli connection add con-name "${CONNECTION_NAME}" \
       type ethernet \
       ifname ${INTERFACE}
fi
Modify connection with "nmcli connection modify".
#!/bin/sh

sudo nmcli connection modify "Wired connection 1" \
     ipv4.method manual \
     ipv4.address "192.168.11.250/24" \
     ipv4.gateway "192.168.11.1" \
     ipv4.dns "192.168.11.2" \
     ipv4.dns-search "hiroom2.com"
sudo reboot
2.5 Static network configuration with systemd-networkd
The systemd-networkd is disabled by default and this is an alternative of NetworkManager.
#!/bin/sh

INTERFACE=ens3

cat <<EOF | sudo tee /etc/systemd/network/${INTERFACE}.network
[Match]
Name=${INTERFACE}

[Network]
DHCP=no
Address=192.168.11.250/24
Gateway=192.168.11.1
DNS=192.168.11.2
Domain=hiroom2.com
EOF

sudo systemctl disable network-manager
sudo systemctl enable systemd-networkd
sudo reboot
3 Network configuration for DHCP
This article will introduce about network configuration for DHCP.
3.1 Network configuration for DHCP with "Settings"
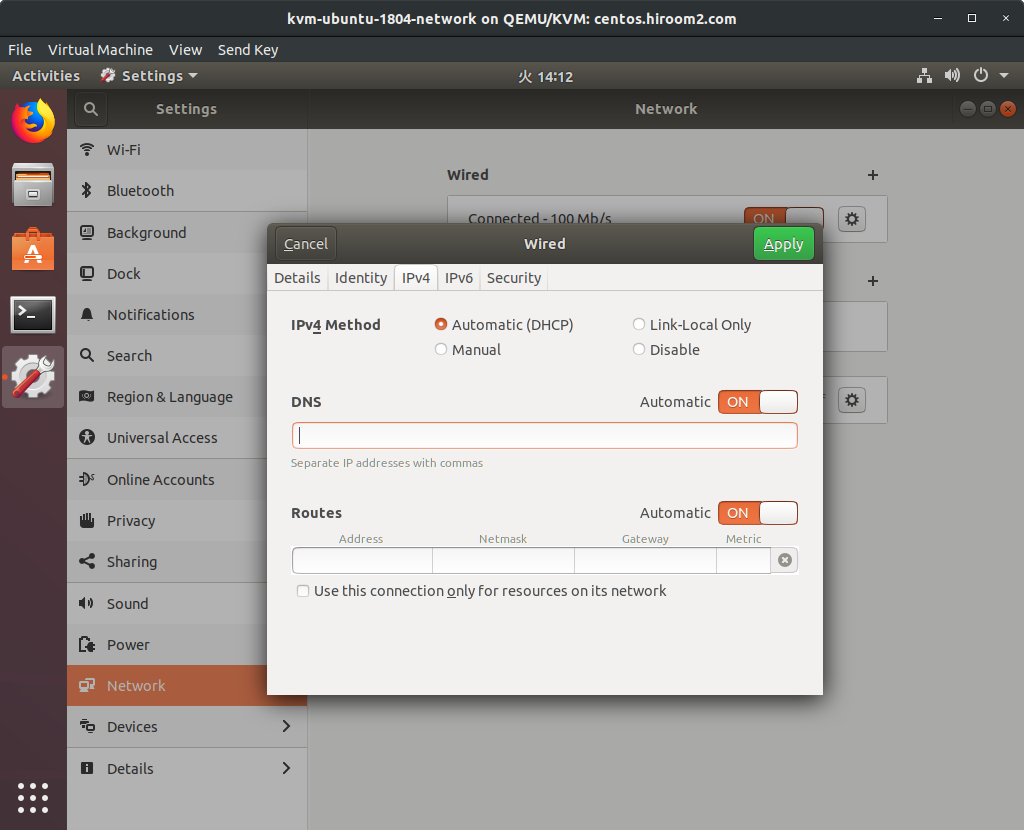
Open "Settings" and edit "Wired" of "Network".
Change "IPv4 Method" to "Automatic (DHCP)". Make "DNS" to be empty.
3.2 Network configuration for DHCP with /etc/network/interfaces (Not recommended)
This will not apply hostname and DNS server which are provided by DHCP server.
#!/bin/sh

INTERFACE=ens3
cat <<EOF | sudo tee /etc/network/interfaces
auto lo
iface lo inet loopback
auto ${INTERFACE}
iface ${INTERFACE} inet dhcp
EOF
3.3 Network configuration for DHCP with nmtui
Run nmcli command with sudo.
$ sudo nmtui
You can move cursor with Ctrl + p, Ctrl + n and TAB, but arrow key may be easier than these. You can select item on cursor with ENTER key.
Select "Edit a connection".
Select "Wired connection 1" of "Ethernet".

If there is no connection, you can add connection with select "Add" and "Ethernet". Input "Profile name" and set "Device" to your network interface name like ens3.


Select right side of "IPv4 CONFIGURATION" and change it to "<Automatic>". Make "Address", "Gateway", "DNS servers" and "Search domains" to be empty with selecting "<Remove>".
Select "<OK>" at the right bottom.
Select "<Back>" at the right bottom.
Select "<Quit>" at the bottom.
3.4 Network configuration for DHCP with nmcli
The nmcli is more useful for script than nmtui.
After installing Ubuntu, "Wired connection 1" is created.
$ nmcli -t -f NAME con
Wired connection 1
If there is no connection, you need to create a connection with "nmcli connection add".
#!/bin/sh

INTERFACE=ens3
CONNECTION_NAME=$(nmcli -t -f NAME connection)
if [ -z "${CONNECTION_NAME}" ]; then
  CONNECTION_NAME='Wired connection 1'
  sudo nmcli connection add con-name "${CONNECTION_NAME}" \
       type ethernet \
       ifname ${INTERFACE}
fi
Modify connection with "nmcli connection modify".
#!/bin/sh

sudo nmcli connection modify "Wired connection 1" \
     ipv4.method auto
sudo reboot
3.5 Network configuration for DHCP with systemd-networkd
The systemd-networkd is disabled by default and this is an alternative of NetworkManager.
#!/bin/sh

INTERFACE=ens3

cat <<EOF | sudo tee /etc/systemd/network/${INTERFACE}.network
[Match]
Name=${INTERFACE}

[Network]
DHCP=yes
EOF

sudo systemctl disable network-manager
sudo systemctl enable systemd-networkd
sudo reboot
3.6 Use specific DNS server instead of DNS servers provided by DHCP server
This will change 192.168.11.2 provided by DHCP server to be 8.8.8.8. You cannot use this configuration if you use network configuration for DHCP with /etc/network/interfaces.
$ systemd-resolve --status ens3
Link 2 (ens3)
      Current Scopes: DNS
       LLMNR setting: yes
MulticastDNS setting: no
      DNSSEC setting: no
    DNSSEC supported: no
         DNS Servers: 192.168.11.2
          DNS Domain: hiroom2.com
If you append DNS server with "Networkd" of "Settings", DNS server provided by DHCP server will be used too as the following.
$ systemd-resolve --status ens3
Link 2 (ens3)
      Current Scopes: DNS
       LLMNR setting: yes
MulticastDNS setting: no
      DNSSEC setting: no
    DNSSEC supported: no
         DNS Servers: 192.168.11.2
                      8.8.8.8
          DNS Domain: hiroom2.com
Disable DNS server provided by DHCP server with nmcli.
#!/bin/sh

sudo nmcli con mod 'Wired connection 1' \
     ipv4.ignore-auto-dns yes \
     ipv4.dns "8.8.8.8" \
     ipv4.dns-search "hiroom2.com"
sudo reboot
Now there is only specified DNS server.
$ systemd-resolve --status ens3
Link 2 (ens3)
      Current Scopes: DNS
       LLMNR setting: yes
MulticastDNS setting: no
      DNSSEC setting: no
    DNSSEC supported: no
         DNS Servers: 8.8.8.8
          DNS Domain: hiroom2.com