This article will install Ubuntu 18.04.
Table of Contents
1 Install Ubuntu 18.04
1.1 Download install media
Download ubuntu-18.04-desktop-amd64.iso from here.
$ wget http://releases.ubuntu.com/18.04/ubuntu-18.04-desktop-amd64.iso
1.2 Install
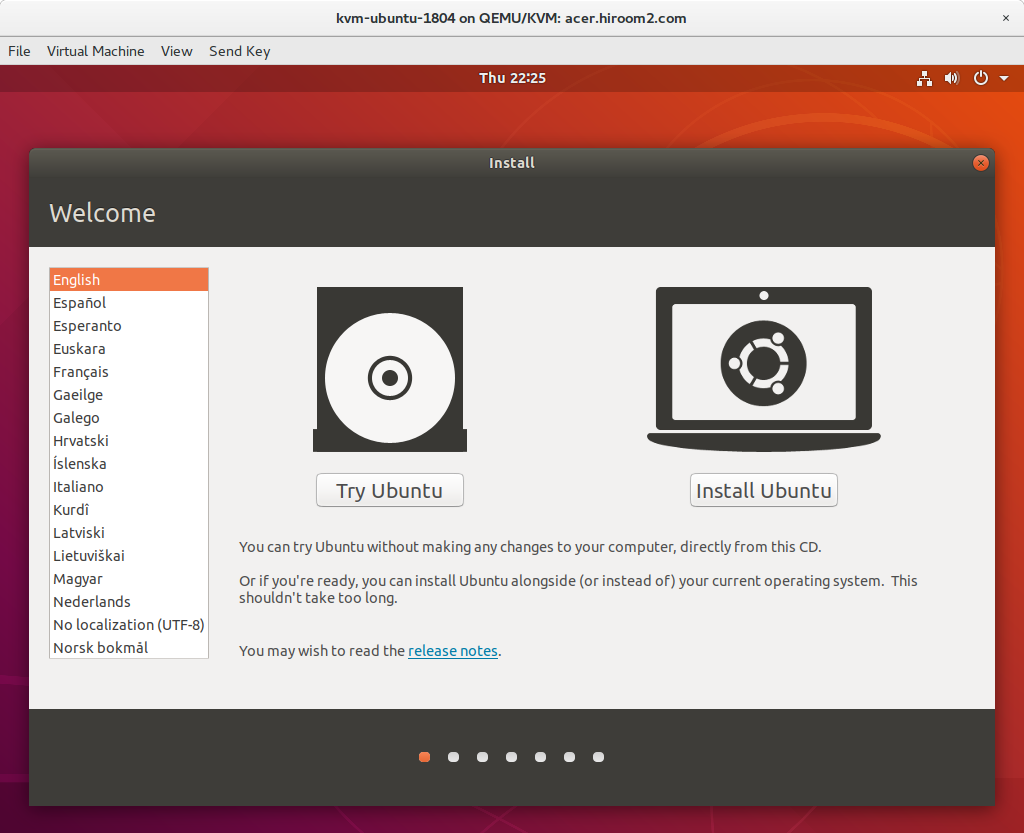
Select language and press "Install Ubuntu".
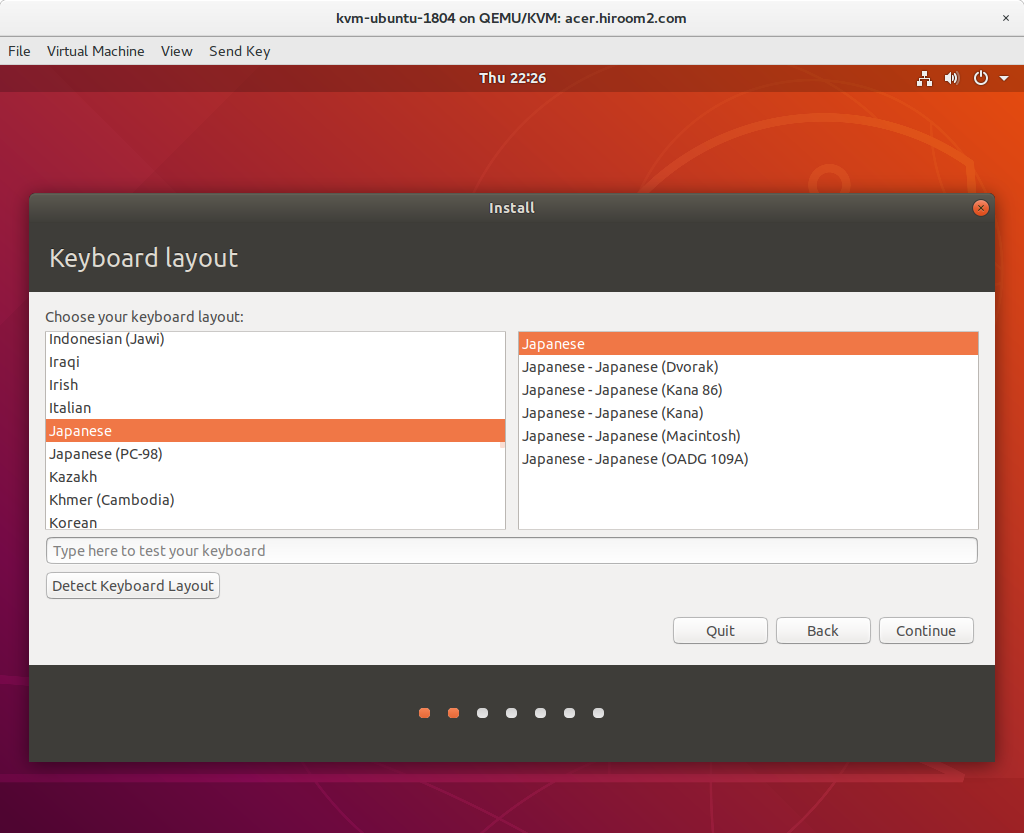
Select keyboard layout.
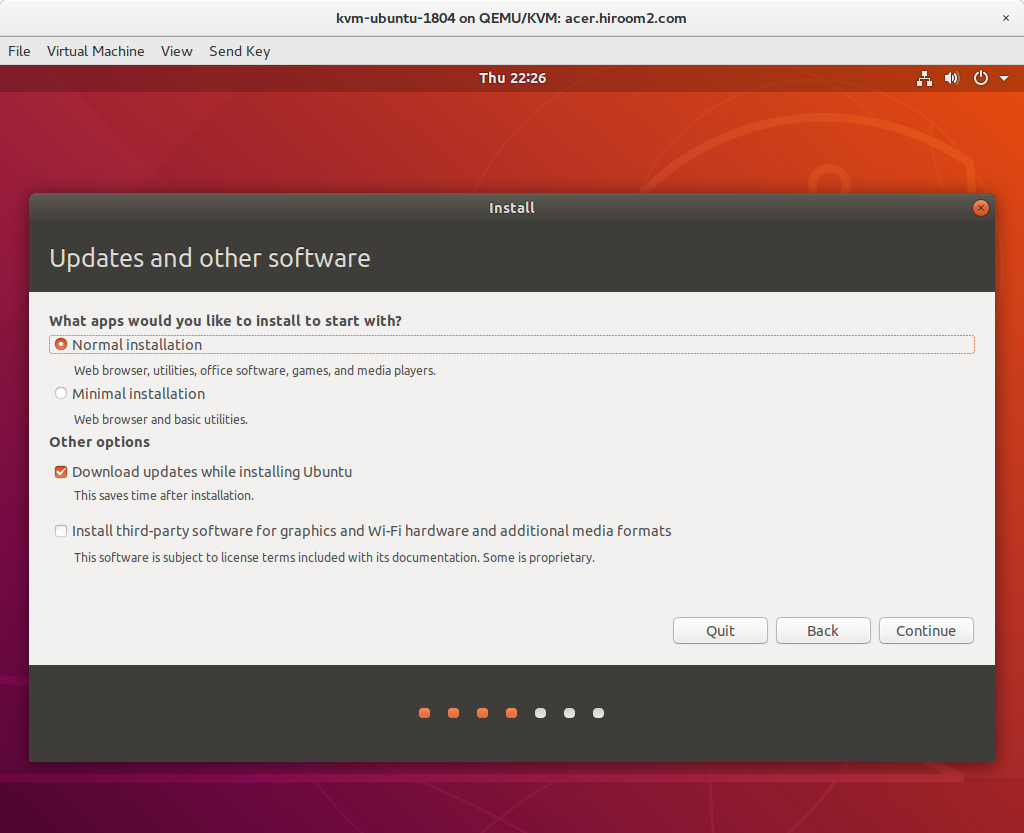
Without size used by swap, "Normal installation" uses 3.9GB storage and "Minimal Installation" needs about 3.3GB storage. Check "Download updates while …" for downloading updates while installation. Check "Install third-party software …" for installing proprietary device driver.
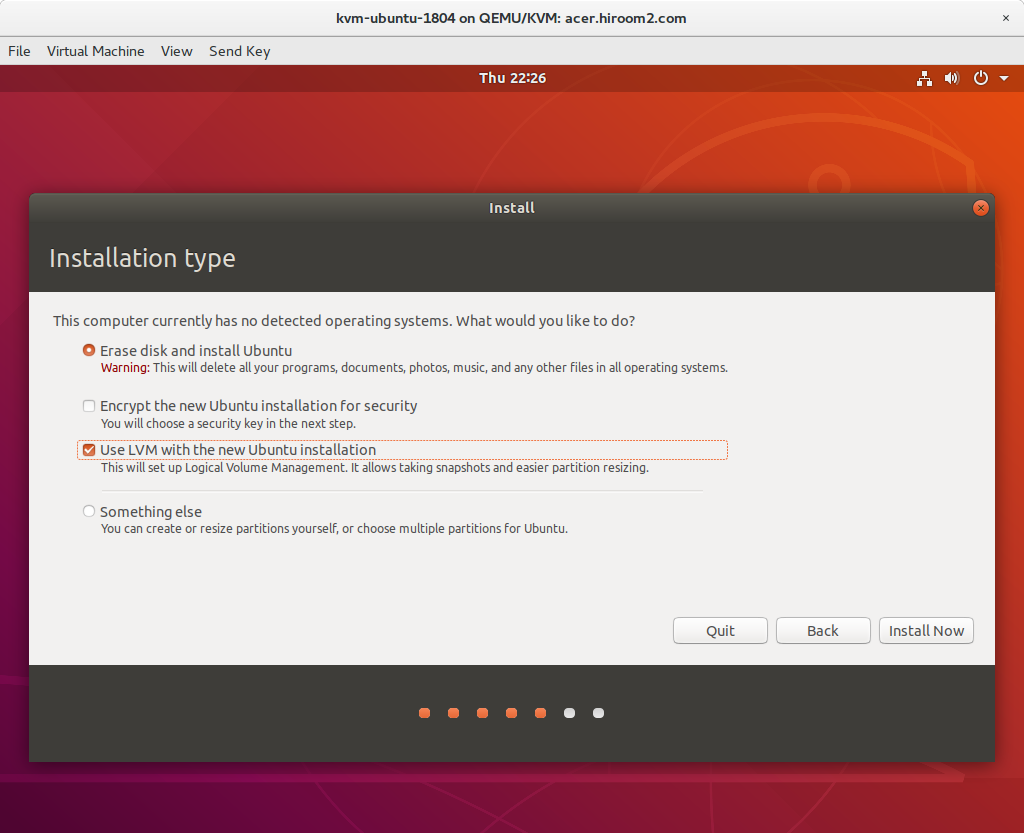
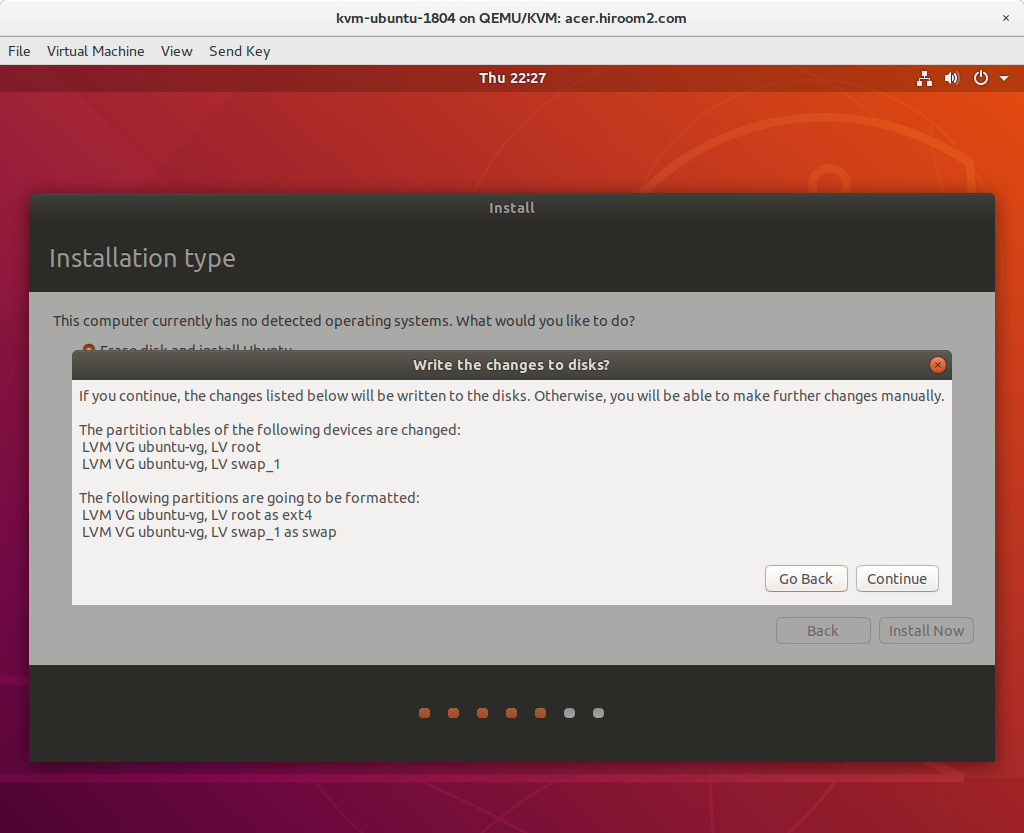
Select disk partition. LVM is recommended for virtual machine.
Confirm disk partition.
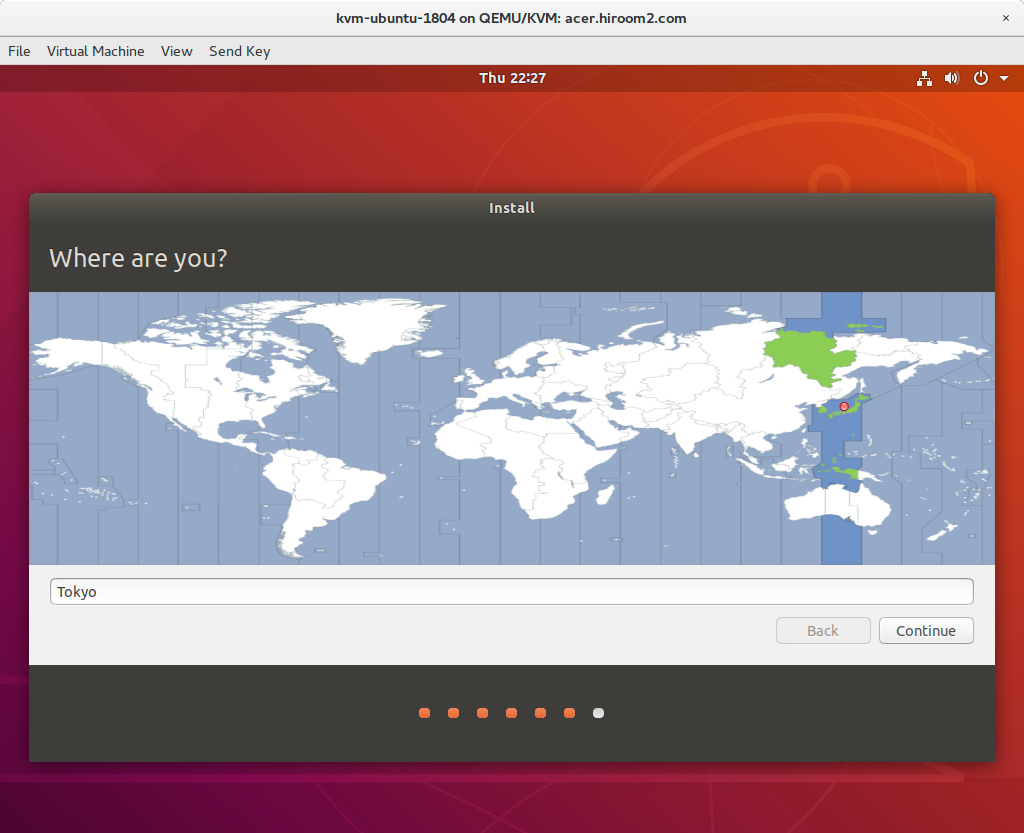
Time zone will be selected automatically. Select time zone with clicking map if you need.
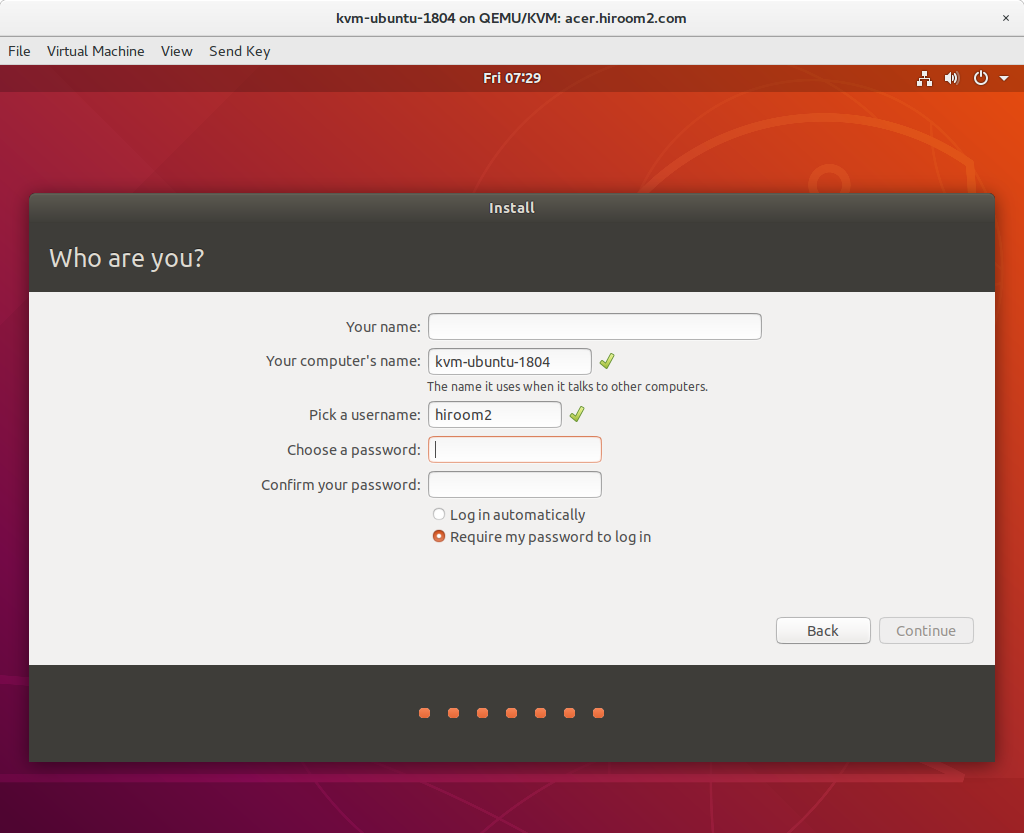
Input computer name, username and password. This username and password will be userd for login and privilege authentication.
Wait completion of installatation.
Restart after installation.

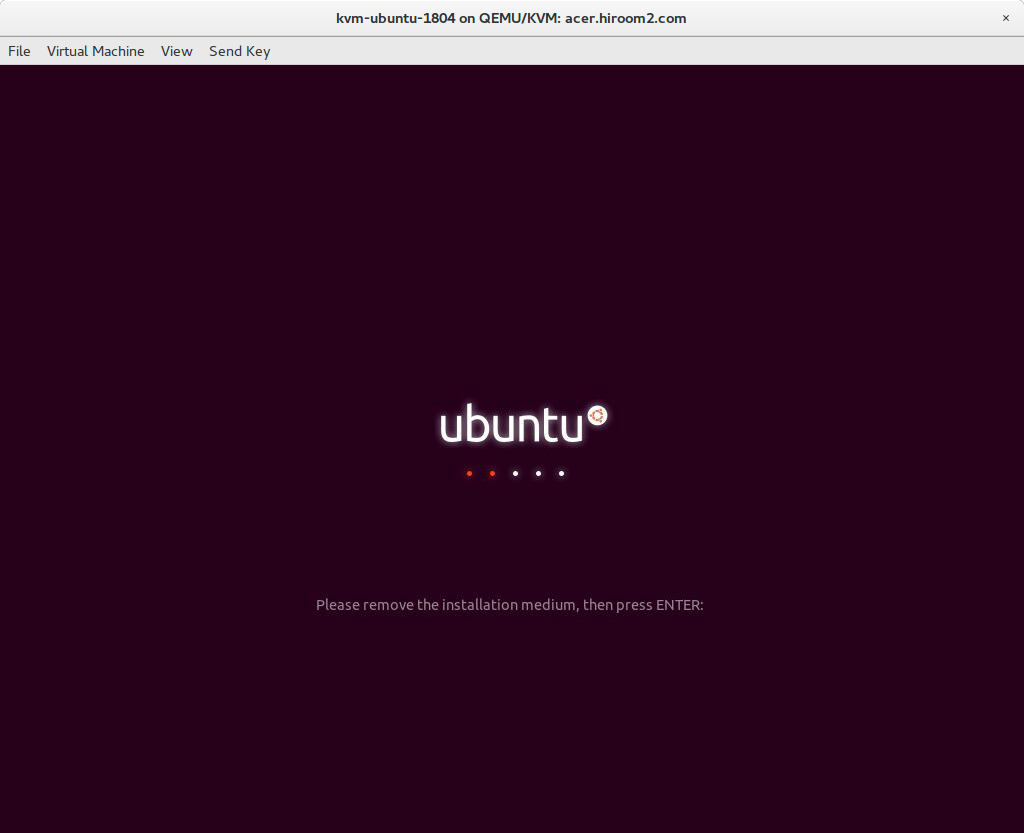
Remove installation media and press ENTER key.
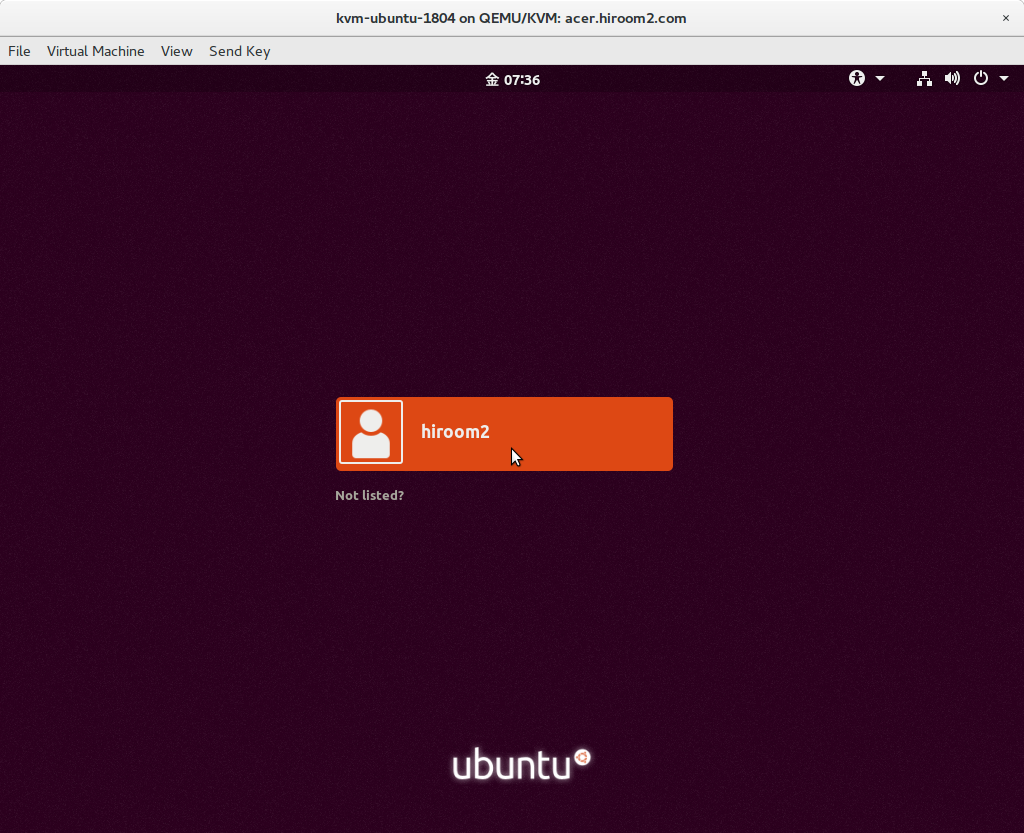
Login is displayed. Click username which was created before, and input password.
1.3 Difference between "Normal Installation" and "Minimal Installation"
About package differences, the following packages were not installed in the Minimal Installation compared to Normal Installation. There is almost no difference.
aisleriot
baobab
branding-ubuntu
cheese
deja-dup
example-content
gir1.2-rb-3.0:amd64
gir1.2-totem-1.0:amd64
gir1.2-totemplparser-1.0:amd64
gnome-calendar
gnome-mahjongg
gnome-mines
gnome-sudoku
gnome-todo
gnome-todo-common
gnome-video-effects
guile-2.0-libs:amd64
hyphen-en-us
libabw-0.1-1:amd64
libavahi-ui-gtk3-0:amd64
libdmapsharing-3.0-2:amd64
libexttextcat-2.0-0:amd64
libexttextcat-data
libfreehand-0.1-1
libgnome-games-support-1-3:amd64
libgnome-games-support-common
libgnome-todo
libmessaging-menu0:amd64
libmhash2:amd64
libminiupnpc10:amd64
libmwaw-0.3-3:amd64
libmythes-1.2-0:amd64
libnatpmp1
libneon27-gnutls:amd64
liborcus-0.13-0:amd64
libpagemaker-0.0-0:amd64
libraptor2-0:amd64
librasqal3:amd64
librdf0:amd64
libreoffice-avmedia-backend-gstreamer
libreoffice-base-core
libreoffice-calc
libreoffice-common
libreoffice-core
libreoffice-draw
libreoffice-gnome
libreoffice-gtk3
libreoffice-help-en-us
libreoffice-impress
libreoffice-math
libreoffice-ogltrans
libreoffice-pdfimport
libreoffice-style-breeze
libreoffice-style-galaxy
libreoffice-style-tango
libreoffice-writer
librhythmbox-core10:amd64
libtotem0:amd64
libvisio-0.1-1:amd64
libwpd-0.10-10:amd64
libwpg-0.3-3:amd64
libwps-0.4-4:amd64
libyajl2:amd64
mythes-en-us
python3-uno
remmina
remmina-common
remmina-plugin-rdp:amd64
remmina-plugin-secret:amd64
remmina-plugin-vnc:amd64
rhythmbox
rhythmbox-data
rhythmbox-plugin-alternative-toolbar
rhythmbox-plugins
shotwell
shotwell-common
simple-scan
thunderbird
thunderbird-gnome-support
thunderbird-locale-en
thunderbird-locale-en-us
totem
totem-common
totem-plugins
transmission-common
transmission-gtk
ubuntu-web-launchers
uno-libs3
ure
usb-creator-gtk
vino
zeitgeist-core
2 Upgrade from Ubuntu 16.04 and Ubuntu 17.10 to Ubuntu 18.04
Update current Ubuntu to latest.
$ sudo apt update -y
$ sudo apt upgrade -y
$ sudo apt dist-upgrade -y
Upgrade from current Ubuntu to Ubuntu 18.04 with do-release-upgrade. But do-release-upgrade needs -d option on 2018/4/27 in order to ReleaseNotes.
$ sudo apt install -y ubuntu-release-upgrader-core
sudo do-release-upgrade
Checking for a new Ubuntu release
No new release found.
$ sudo do-release-upgrade -d # If do-release upgrade cannot find
Type y for starting upgrade.
Installing the upgrade can take several hours. Once the download has
finished, the process cannot be canceled.

 Continue [yN]  Details [d]y
If you have modified files, overwrite caution will be displayed. Type Y or N.
Configuration file '/etc/NetworkManager/NetworkManager.conf'
 ==> Modified (by you or by a script) since installation.
 ==> Package distributor has shipped an updated version.
   What would you like to do about it ?  Your options are:
    Y or I  : install the package maintainer's version
    N or O  : keep your currently-installed version
      D     : show the differences between the versions
      Z     : start a shell to examine the situation
 The default action is to keep your current version.
*** NetworkManager.conf (Y/I/N/O/D/Z) [default=N] ? N
Type y for removing obsoleted software.
270 packages are going to be removed.

Removing the packages can take several hours.

 Continue [yN]  Details [d]y
Type y for reboot.
System upgrade is complete.

Restart required

To finish the upgrade, a restart is required.
If you select 'y' the system will be restarted.

Continue [yN]y
Ubuntu 18.04 will be started after reboot.
$ lsb_release -a
No LSB modules are available.
Distributor ID: Ubuntu
Description:    Ubuntu 18.04 LTS
Release:        18.04
Codename:       bionic
3 Set up Canonical Livepatch with GNOME3 Initial Setup
Canonical Livepath is one implementation of Kernel Livepatch. This can be used from Ubuntu 16.04, Ubuntu 18.04 makes setting to be more easier with GNOME3 Initial Setup.
There are other implementations like RedHat's kpatch and SUSE's kGraft.
Kernel is always updating for security and bug. And you need to restart machine for applying kernel update.
If using Kernel Livepatch, you can apply kernel update without restarting machine. So you can control machine restartning.
Canonical Livepatch needs Ubuntu Single Sign On account. With one Ubuntu Single Sign On account, Canonical Livepatch can be used to three machine for free. Ubuntu Single Sign On account needs e-mail address.
This article will describe registering Ubuntu Single Sign On account and setting up Canonical Livepatch.
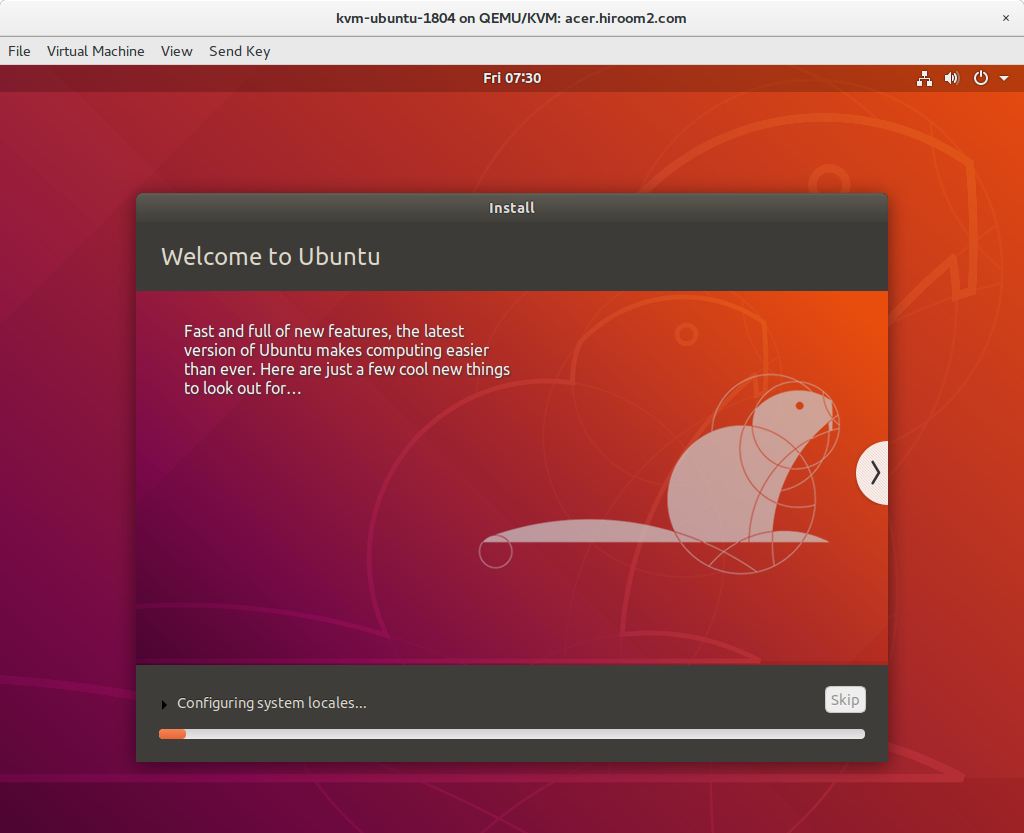
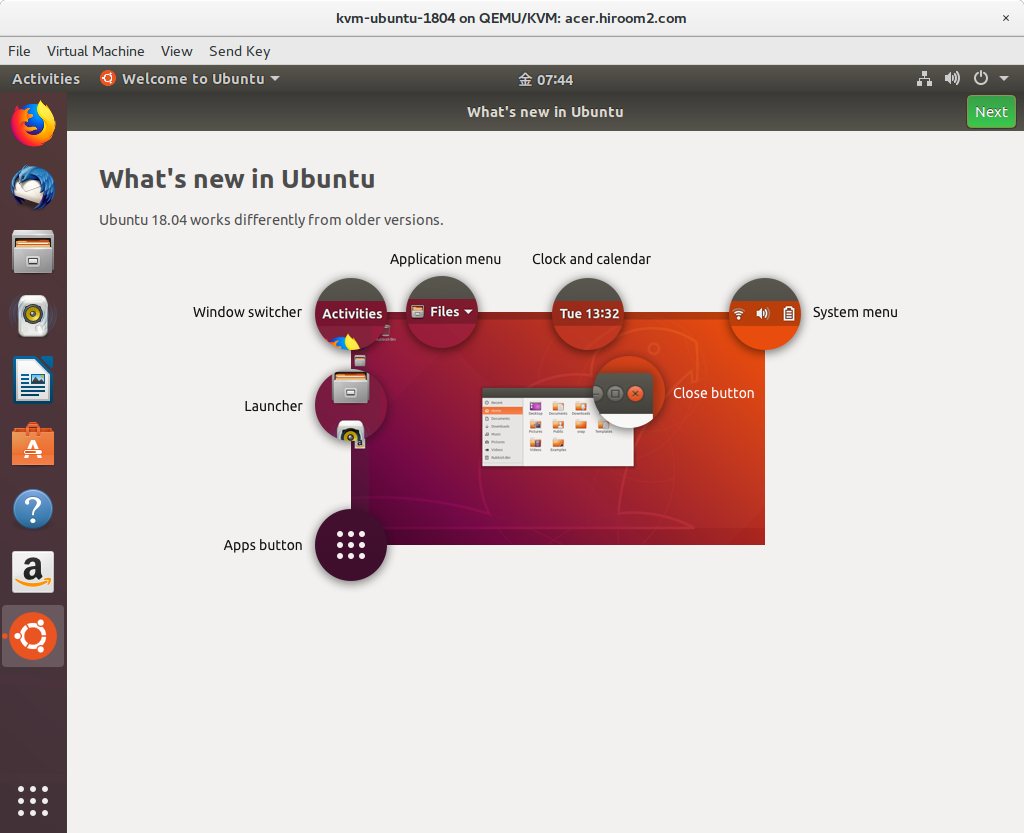
For first time login, GNOME3 Initial Setup dialog named "Welcome to Ubuntu" is displayed.
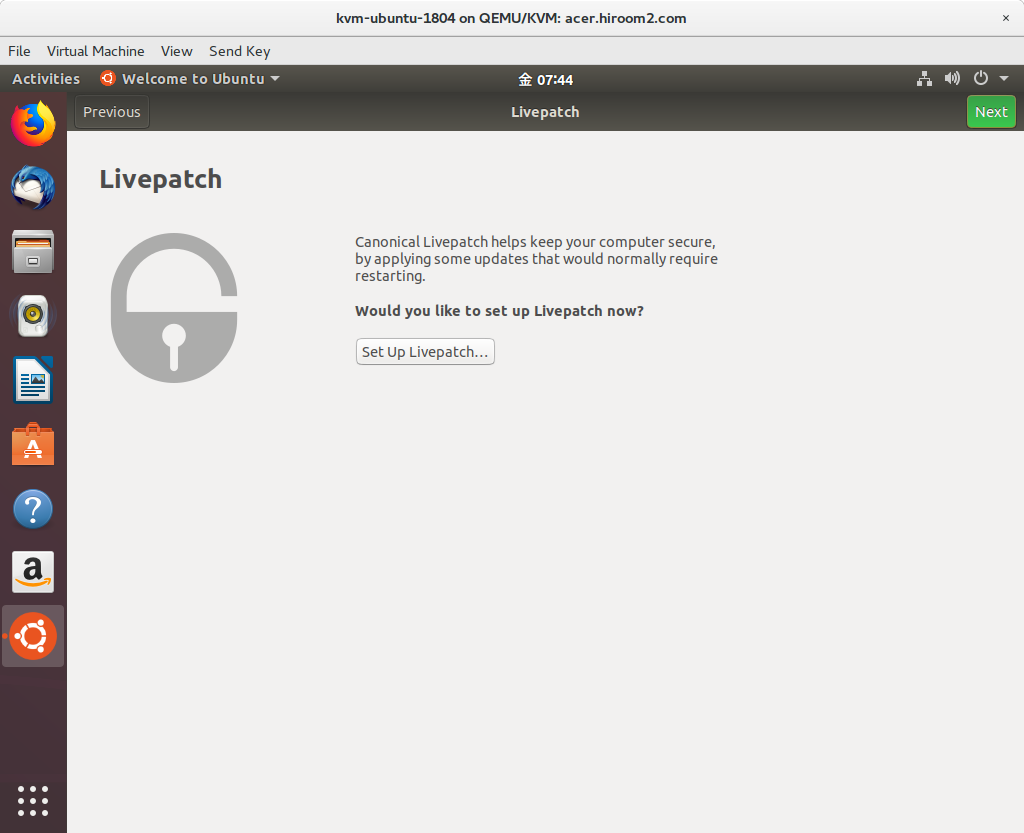
Canonical Livepatch setting is displayed. Click "Set Up Livepatch".
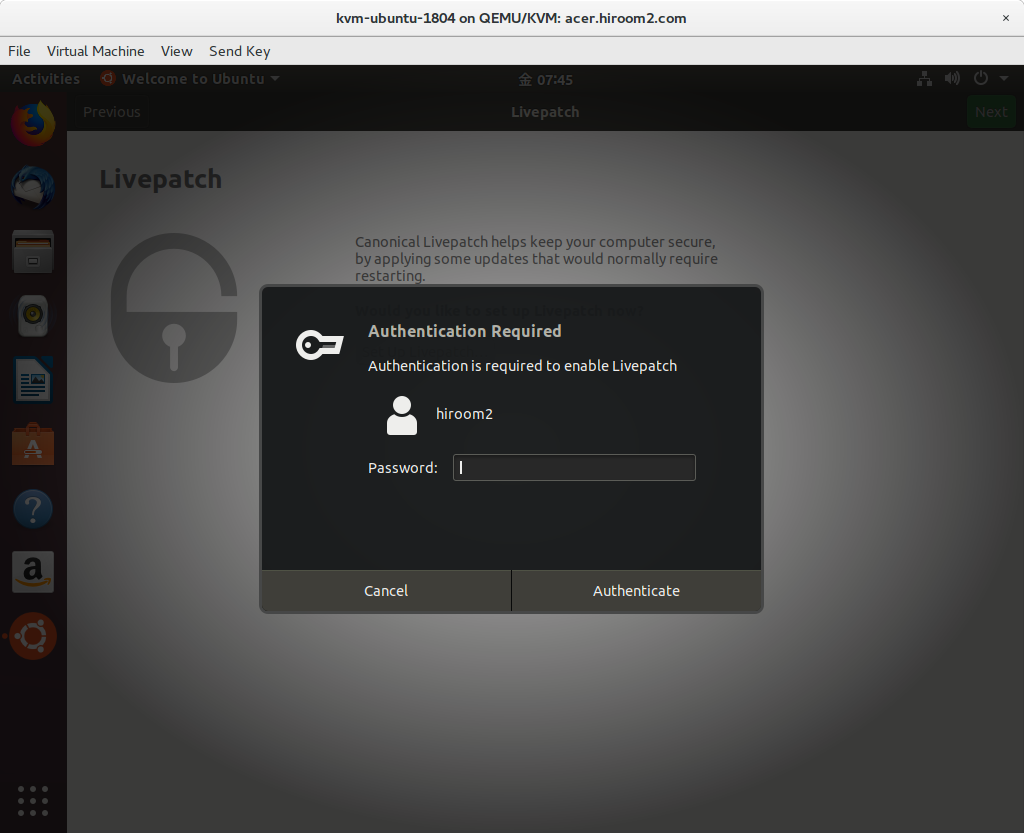
Because root privilege is needed, "Authentication Required" is displayed. Input password of user which is created when installation.
If you don't have Ubuntu Single Sign On account, Check "I want to register for an account now" and click "Connect".
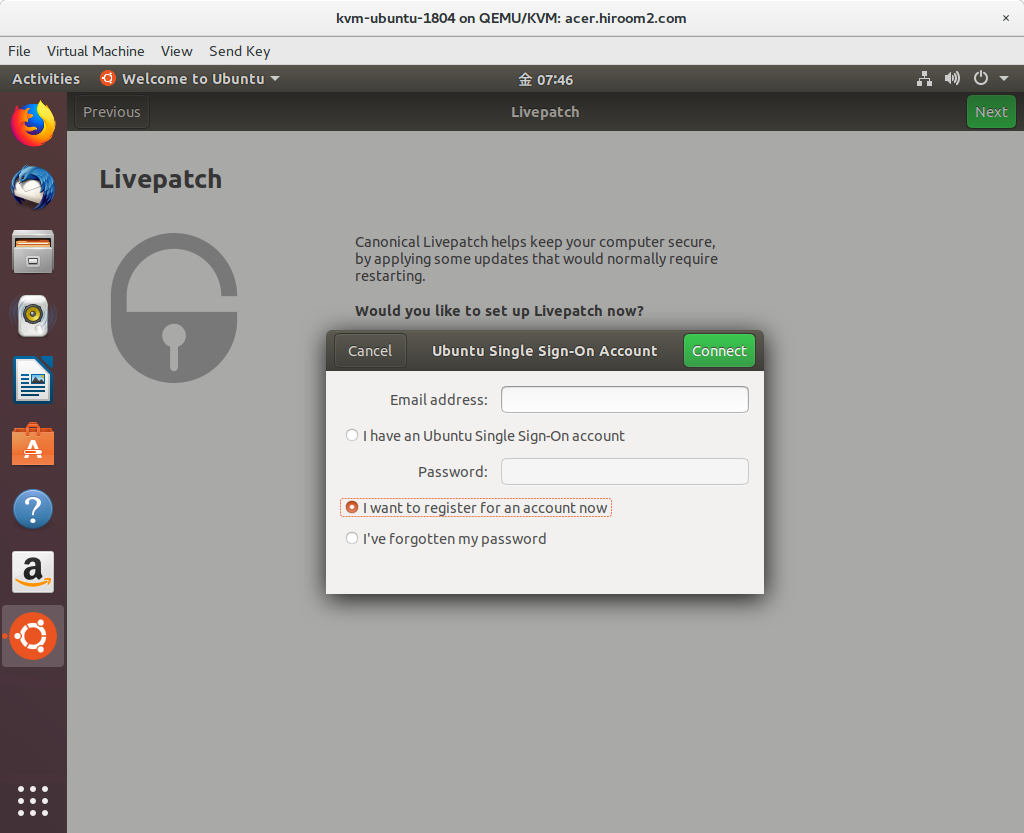
Firefox will open Ubuntu Single Sign On page. Input e-mail, name, username and password. Confirm and check "Ubuntu One terms of service". And then click "Create account".

Go back to "Welcome to Ubuntu". Check "I have an Ubuntu Single Sign-On account". And input e-mail and password of Ubuntu Single Sign On account.

Because root privilege is needed, "Authentication Required" will be displayed twice. Input password of user which is created when installation.
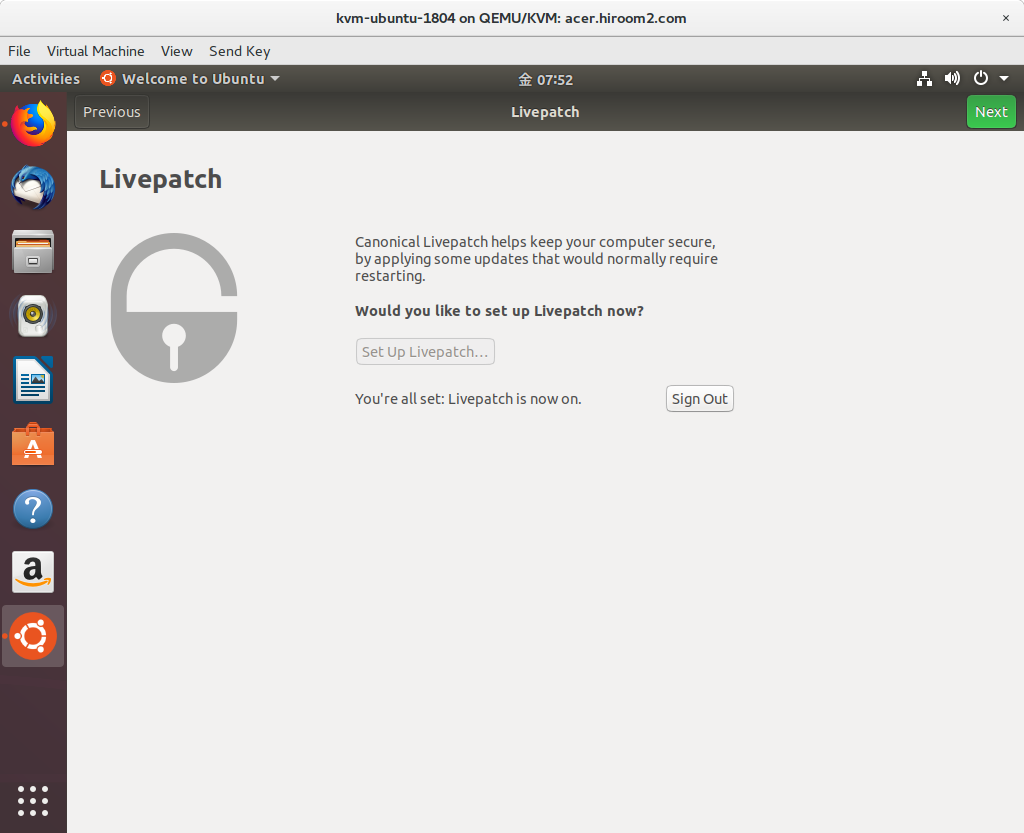
Canonical Livepatch setting is completed. Click "Next".
If you do'nt want to send statics report to developper, check "No, don't send system info".

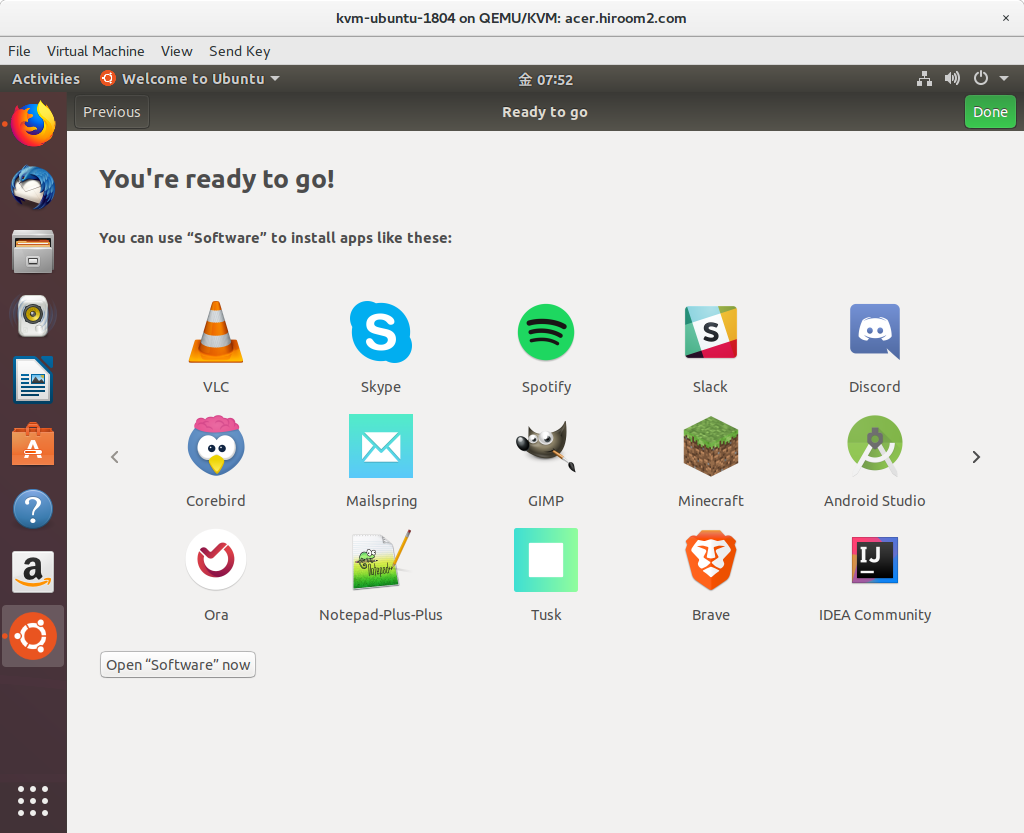
GNOME3 Initial Setup is completed.
4 Run GNOME3 Initial Setup manually
If you need to set up Canonical Livepatch later, you can run GNOME3 Initial Setup manually.
Click /usr/share/applications/gnome-initial-setup.desktop which is an icon named "Initial Setup"

Or run the following command on terminal.
$ /usr/lib/gnome-initial-setup/gnome-initial-setup
5 Changes from Ubuntu 16.04
5.1 Desktop environment is changed from Unity to GNOME3
Ubuntu 17.10 changes desktop environment from Unity to GNOME3.
Because this GNOME3 is customized (See ubuntu-session package.), this is similar with Unity than GNOME3 in Fedora and CentOS.
5.2 systemd-resolved is used for name resolution
I guess that the almost distribution which uses systemd will use systemd-resolved.
The following nameserver 127.0.0.53 in /etc/resolv.conf is systemd-resolved and systemd-resolved sends query to DNS server. If there are DNS servers, systemd-resolved will use round robin to send query.
$ cat /etc/resolv.conf
<snip>
nameserver 127.0.0.53
The following command will clear DNS cache in local host. systemd-resolved does not have DNS cache but clear DNS cache in local host.
$ sudo systemd-resolve --flush-caches
5.3 net-tools package is not installed by default
net-tools package which has ifconfig command and route command is not installed by default. You need to install net-tools package, or need to use iproute2 package which has a ip command.
Comparison with net-tools package and iproute2 package is the following.
| net-tools | iproute2 |
|---|---|
| ifconfig -a | ip addr |
| ifconfig eth0 | ip addr show eth0 |
| ifconfig eth0 up | ip link set eth0 up |
| ifconfig eth0 down | ip link set eth0 down |
| ifconfig eth0 192.168.0.1 \ | ip addr add 192.168.0.1/24 dev eth0 |
| netmask 255.255.255.0 | |
| route | ip route |
| route add default gw 192.168.0.1 | ip route add default via 192.168.0.1 |
| route add -net 192.168.0.0 \ | ip route add 192.168.0.0/24 dev eth0 |
| netmask 255.255.255.0 dev eth0 |