ユーザ毎のwebサーバを立ち上げるuserdirモジュールの使い方を記載します。
Table of Contents
1 httpdのインストール
yumでhttpdをインストールします。
$ sudo yum install -y httpd
$ sudo systemctl enable httpd
$ sudo systemctl restart httpd
2 firewall-cmd
httpサービスファイルでポートを開けます。
$ sudo firewall-cmd --add-service=http --permanent
$ sudo firewall-cmd --reload
3 SELinux
public_html配下のファイルを読み込めるようにします(例えば、public_html/index.html)。
$ sudo setsebool -P httpd_read_user_content on
4 userdir.conf
UserDirを有効にします。
$ diff -uprN /etc/httpd/conf.d/userdir.conf{.org,}
--- /etc/httpd/conf.d/userdir.conf.org  2016-06-03 08:55:49.392462419 +0900
+++ /etc/httpd/conf.d/userdir.conf      2016-06-03 08:56:05.820317791 +0900
@@ -14,14 +14,14 @@
     # of a username on the system (depending on home directory
     # permissions).
     #
-    UserDir disabled
+    #UserDir disabled

     #
     # To enable requests to /~user/ to serve the user's public_html
     # directory, remove the "UserDir disabled" line above, and uncomment
     # the following line instead:
     #
-    #UserDir public_html
+    UserDir public_html
 </IfModule>

 #
5 ホームディレクトリのパーミッションは701か710
ホームディレクトリのパーミッションを700から701へ変更しないと403 Forbiddenとなります。
/home/*/の実行権限がなく、public_htmlを開くことができないからです。
$ chmod 701 ~
ただし、この場合はローカルユーザ全てがホームディレクトリに実行権限があることになり、ホームディレクトリ配下のディレクトリへアクセスすることが可能になります。
[foobar@centos-7 ~]$ ls /home/hiroom2/
ls: cannot open directory /home/hiroom2/: Permission denied
[foobar@centos-7 ~]$ ls /home/hiroom2/Downloads
emacs-24.4.tar.gz
そこで、ここではapacheグループのみにホームディレクトリへの実行権限を付与するようにします。若干気味が悪い設定ですが、ローカルユーザ全てへ実行権限を渡すよりかは権限の範囲を絞ることができます。
$ sudo chown hiroom2:apache ~
$ chmod 710 ~
なお、701の場合も710の場合でも、他者からホームディレクトリ配下のディレクトリを隠蔽したい場合は700のディレクトリを一つ作成し、その下にファイルやディレクトリを置くようにする必要があります。
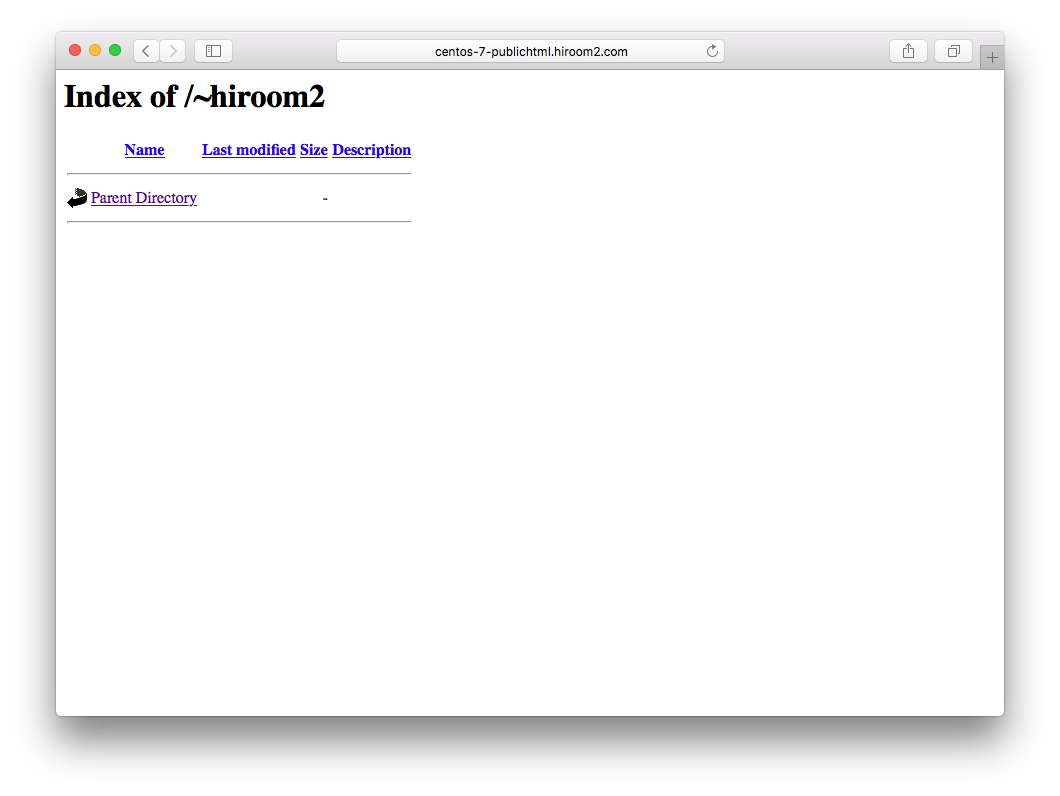
6 public_htmlの作成
public_htmlを755のパーミッションで作成します。
$ mkdir ~/public_html
$ chmod 755 ~/public_html
このまま以下のURLにアクセスすると以下の様な画面が表示されます。
ファイルをダウンロードさせるだけならばこのままpublic_htmlにファイルを置くだけでも良いでしょう。
http://<server>/~<username>
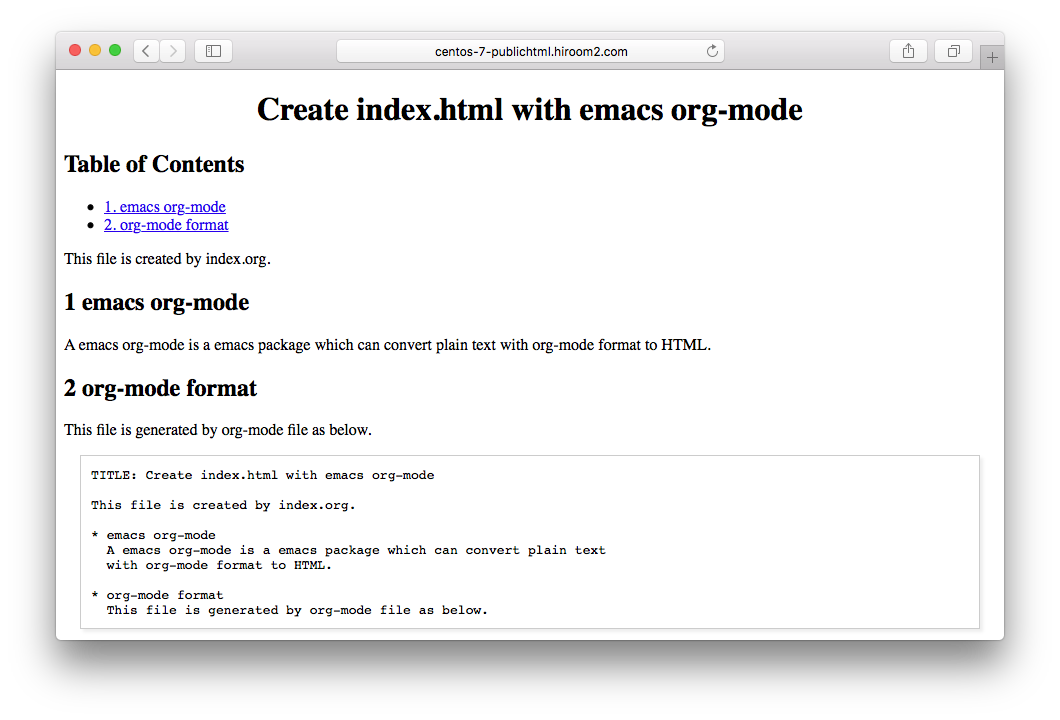
URLにアクセスするとDirectoryIndexにindex.htmlやindex.cgiがデフォルトで呼ばれます。
index.htmlを作成して簡易なページを表示させることもできます。
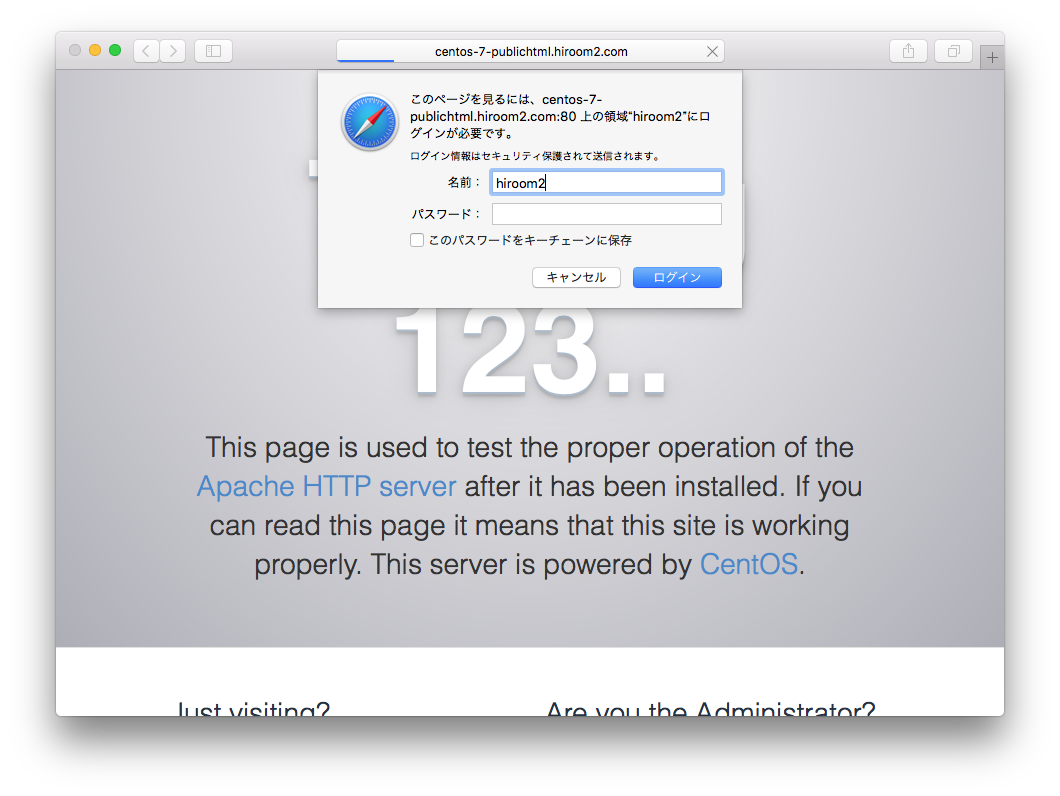
7 Digest認証の導入
以下の様なpublic_html/.htaccessを作成します。"hiroom2"はレルムと呼ばれるものです。
AuthType Digest
AuthName "hiroom2"
AuthUserFile /home/hiroom2/.htdigest
require valid-user
レルム"hiroom"へアクセスするユーザhiroom2を追加します。
$ htdigest -c ~/.htdigest "hiroom2" hiroom2
Adding password for hiroom2 in realm hiroom2.
New password:
Re-type new password:
ページにアクセスするとユーザ名とパスワードを求められます。
8 CGIの導入
userdirはデフォルトでExecCGIを許可していません。
CGI導入するならDocker等でコンテナを作成した方が良いのかもしれません。
userdir.confのOptionsにExecCGIを追加します。
$ diff -uprN /etc/httpd/conf.d/userdir.conf{.org,}
--- /etc/httpd/conf.d/userdir.conf.org  2016-06-03 11:07:41.421962082 +0900
+++ /etc/httpd/conf.d/userdir.conf      2016-06-03 12:19:32.778261136 +0900
@@ -30,7 +30,7 @@
 #
 <Directory "/home/*/public_html">
     AllowOverride FileInfo AuthConfig Limit Indexes
-    Options MultiViews Indexes SymLinksIfOwnerMatch IncludesNoExec
+    Options ExecCGI MultiViews Indexes SymLinksIfOwnerMatch IncludesNoExec
     Require method GET POST OPTIONS
 </Directory>
以下の様なpublic_html/.htaccessを作成します。
AddHandler cgi-script .cgi
以下のindex.cgiを追加します。パーミッションを755にするだけでなく、SELinuxのhttpd_sys_script_exec_tラベルも付与する必要があります。
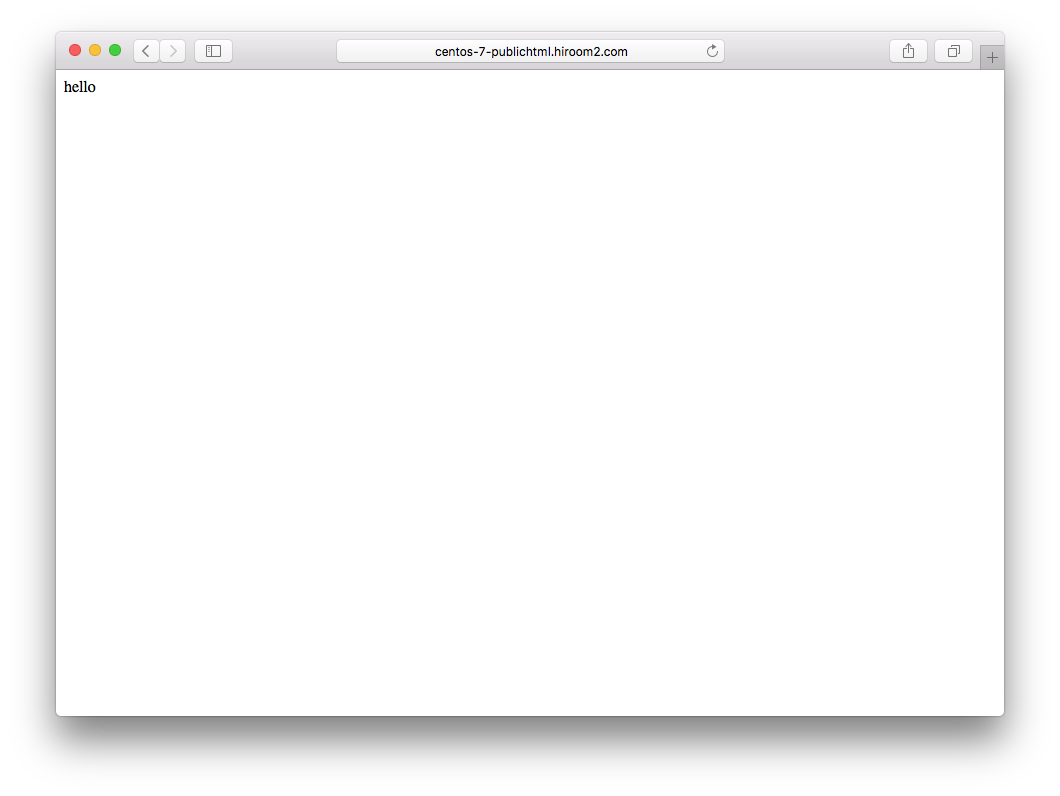
$ cat <<EOF > ~/public_html/index.cgi
#!/bin/sh

echo "Content-type: text/html"
echo ""
echo "hello"
EOF
$ chmod 755 ~/public_html/index.cgi
$ chcon -t httpd_sys_script_exec_t ~/public_html/index.cgi
URLにアクセスするとindex.cgiによるHTMLが出力されました。