KVMを使った仮想環境の管理に今まではvirt-managerを使っていたのですが、ssh -X経由でGUIウィンドウを操作するのが少々面倒に感じてきました。
ブラウザ経由で操作する方法はないかなと調べてみたところ、webvirtmgrというパッケージを見つけました。virt-managerでKVMを管理している環境上にwebvirtmgrを導入する手順を記載します。
Table of Contents
1 webvirtmgrのインストール
1.1 必要パッケージ
私の環境はCentOS7なので、以下のコマンドでインストールします。
sudo yum -y install http://dl.fedoraproject.org/pub/epel/7/x86_64/e/epel-release-7-5.noarch.rpm
sudo yum -y install git python-pip libvirt-python libxml2-python python-websockify supervisor nginx
1.2 webvirtmgr
webvirtmgrをダウンロードし、pythonのスクリプトを動かします。
git clone git://github.com/retspen/webvirtmgr.git
cd webvirtmgr
sudo pip install -r requirements.txt
以下のコマンドでyesを入力し、username, email, passwordを入力します。
./manage.py syncdb
以下のコマンドでyesを入力します。
./manage.py collectstatic
以下のコマンドでsuperuserの設定をします。先ほど入力したusernameとは別の名前を入力し、email、passwordを設定します。
./manage.py createsuperuser
ここで作成したusernameとpasswordはブラウザでwebvirtmgrにログインした際に使用します。
webvirtmgrを/var/wwwに設置します。
sudo cp -a ../webvirtmgr /var/www/
1.3 Nginx
webvirtmgrのユーザ・グループをnginxに変更します。
sudo chown -R nginx:nginx /var/www/webvirtmgr
Nginxの設定ファイルを追加します。
sudo emacs /etc/nginx/conf.d/webvirtmgr.conf
webvirtmgr.confの内容は以下の通りです。
server {
    listen 80 default_server;

    server_name $hostname;
    #access_log /var/log/nginx/webvirtmgr_access_log;

    location /static/ {
        root /var/www/webvirtmgr/webvirtmgr; # or /srv instead of /var
        expires max;
    }

    location / {
        proxy_pass http://127.0.0.1:8000;
        proxy_set_header X-Real-IP $remote_addr;
        proxy_set_header X-Forwarded-for $proxy_add_x_forwarded_for;
        proxy_set_header Host $host:$server_port;
        proxy_set_header X-Forwarded-Proto $remote_addr;
        proxy_connect_timeout 600;
        proxy_read_timeout 600;
        proxy_send_timeout 600;
        client_max_body_size 1024M; # Set higher depending on your
        needs
    }
}
/etc/nginx/nginx.confでポート80のserverをコメントアウトします。
diff -uprN /etc/nginx/nginx.conf{.bak,}
--- /etc/nginx/nginx.conf.bak 2015-01-28 23:50:55.698136795 +0900
+++ /etc/nginx/nginx.conf 2015-01-28 23:51:29.321824910 +0900
@@ -42,31 +42,31 @@ http {
     # for more information.
     include /etc/nginx/conf.d/*.conf;

-    server {
-        listen       80 default_server;
-        server_name  localhost;
-        root         /usr/share/nginx/html;
-
-        #charset koi8-r;
-
-        #access_log  /var/log/nginx/host.access.log  main;
-
-        # Load configuration files for the default server block.
-        include /etc/nginx/default.d/*.conf;
-
-        location / {
-        }
-
-        # redirect server error pages to the static page /40x.html
-        #
-        error_page  404              /404.html;
-        location = /40x.html {
-        }
-
-        # redirect server error pages to the static page /50x.html
-        #
-        error_page   500 502 503 504  /50x.html;
-        location = /50x.html {
-        }
-    }
+#    server {
+#        listen       80 default_server;
+#        server_name  localhost;
+#        root         /usr/share/nginx/html;
+#
+#        #charset koi8-r;
+#
+#        #access_log  /var/log/nginx/host.access.log  main;
+#
+#        # Load configuration files for the default server block.
+#        include /etc/nginx/default.d/*.conf;
+#
+#        location / {
+#        }
+#
+#        # redirect server error pages to the static page /40x.html
+#        #
+#        error_page  404              /404.html;
+#        location = /40x.html {
+#        }
+#
+#        # redirect server error pages to the static page /50x.html
+#        #
+#        error_page   500 502 503 504  /50x.html;
+#        location = /50x.html {
+#        }
+#    }
 }
SELinuxで以下を許可します。CentOS7ではsetsebool -Pがreboot後にリセットされる為、/etc/selinux/targeted/booleansに下記を記述します。
httpd_can_network_connect=1
httpd_read_user_content=1
httpのポートを開きます。
firewall-cmd --permanent --add-service=http
Nginxを再起動します。
sudo service nginx restart
NginxをCentOS起動時に動くようにします。
sudo systemctl enable nginx.service
1.4 supervisord
/etc/supervisord.conに以下を追加します。
[program:webvirtmgr]
command=/usr/bin/python /var/www/webvirtmgr/manage.py run_gunicorn -c
/var/www/webvirtmgr/conf/gunicorn.conf.py
directory=/var/www/webvirtmgr
autostart=true
autorestart=true
logfile=/var/log/supervisor/webvirtmgr.log
log_stderr=true
user=nginx

[program:webvirtmgri-console]
command=/usr/bin/python /var/www/webvirtmgr/console/webvirtmgr-console
directory=/var/www/webvirtmgr
autostart=true
autorestart=true
stdout_logfile=/var/log/supervisor/webvirtmgr-console.log
redirect_stderr=true
user=nginx
supervisordを再起動します。
sudo service supervisord restart
supervisordをCentOS起動時に動くようにします。
sudo systemctl enable supervisord.service
1.5 novnc
novncはHTML5で記述されたvncクライアントです。
sudo cp /var/www/webvirtmgr/conf/initd/webvirtmgr-novnc-redhat /etc/init.d/webvirtmgr-novnc
sudo chkconfig --add webvirtmgr-novnc:
/etc/init.d/webvirtmgr-novnc start
firewall-cmd --add-port=6080/tcp --permanent
2 webvirtmgrの設定
2.1 接続
http://[Server Name]で接続できます。webvirtmgrが動作しているマシンからはhttp://localhost:8000でも接続でき ます。
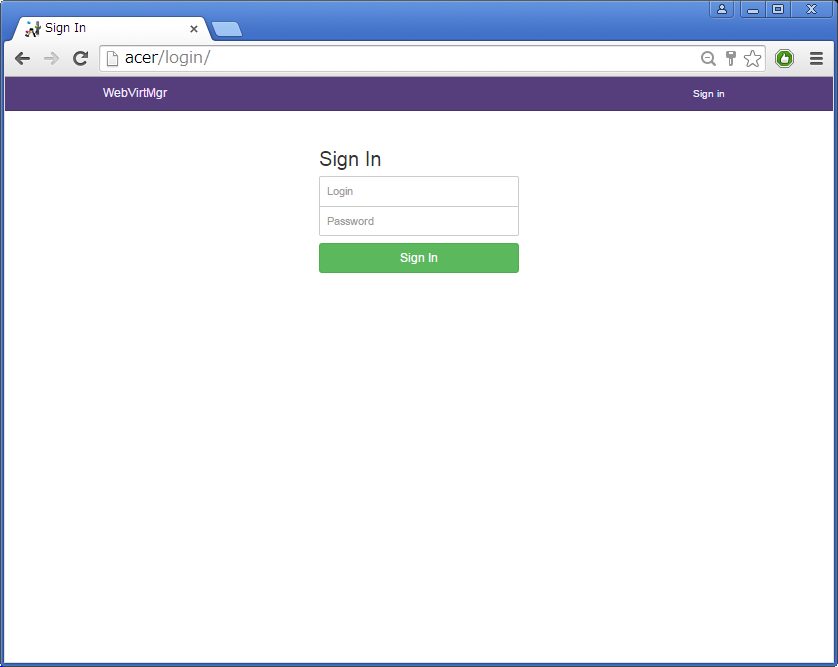
2.2 ログイン
./manage.pyで作成したusernameとpasswordでログインします。
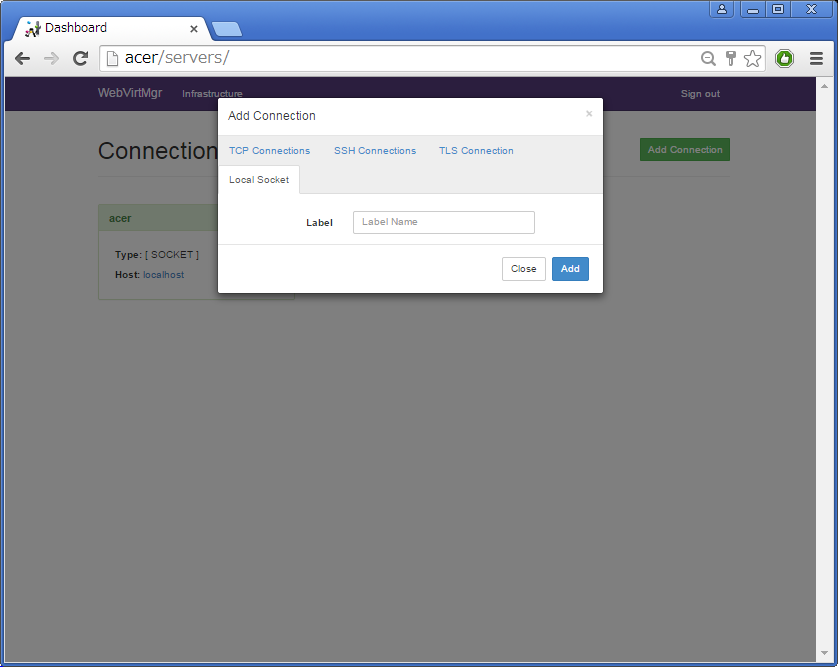
2.3 VM環境の登録
Add ConnectionボタンでVM環境のマシンを登録します。
今回はwebvirtmgrと同じマシンのVM環境を使用する為、Local SocketでLabel名を入力するだけで登録は完了です。
2.4 vncの設定
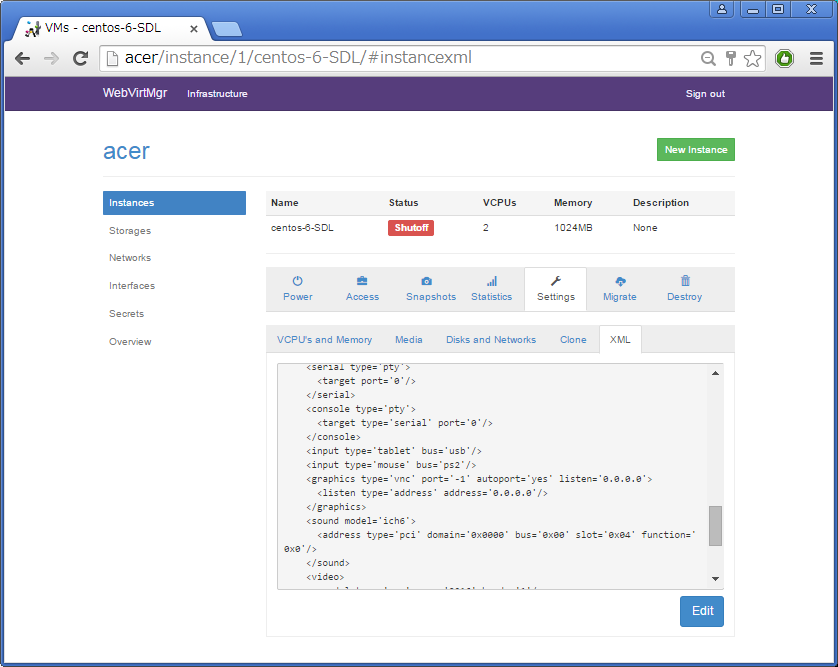
virt-managerで作成した仮想マシンの設定ではnovnc接続が上手くいきませんでした。
そこで、仮想マシンのxmlのvncのエントリを次のように変更します。
- <graphics type='vnc' port='-1' autoport='yes'/>
+ <graphics type='vnc' port='5900' autoport='yes' listen='0.0.0.0'>
+   <listen type='address' address='0.0.0.0'/>
+ </graphics>
xmlの変更はvirsh editコマンド、あるいはwebvirtmgr上で実行できます。
sudo virsh edit [VMNAME]
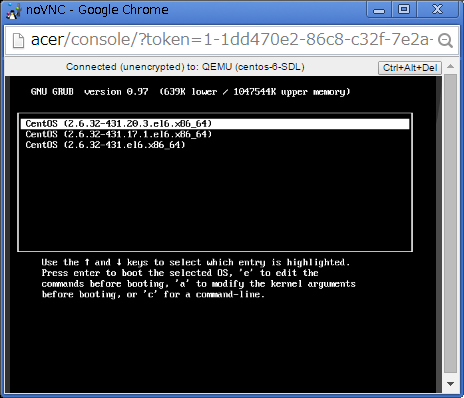
novncの画面は以下の通りです。
3 まとめ
以上でvirt-manager相当の操作がブラウザ経由で可能となりました。かなり使いやすいと思います。
yumやaptで入れることができるようになると嬉しいですね。